

CentraHub CRM’s Warranty Management tool helps to reduce warranty cost and increases the revenue of service. It maintains complete details about the customers, products and their warranties. The warranty management tool helps to keep each and every information about the products in a single cloud platform. It includes a centralized form that can be accessed anytime and from anywhere.
In CentraHub, warranty management can be created in three steps:
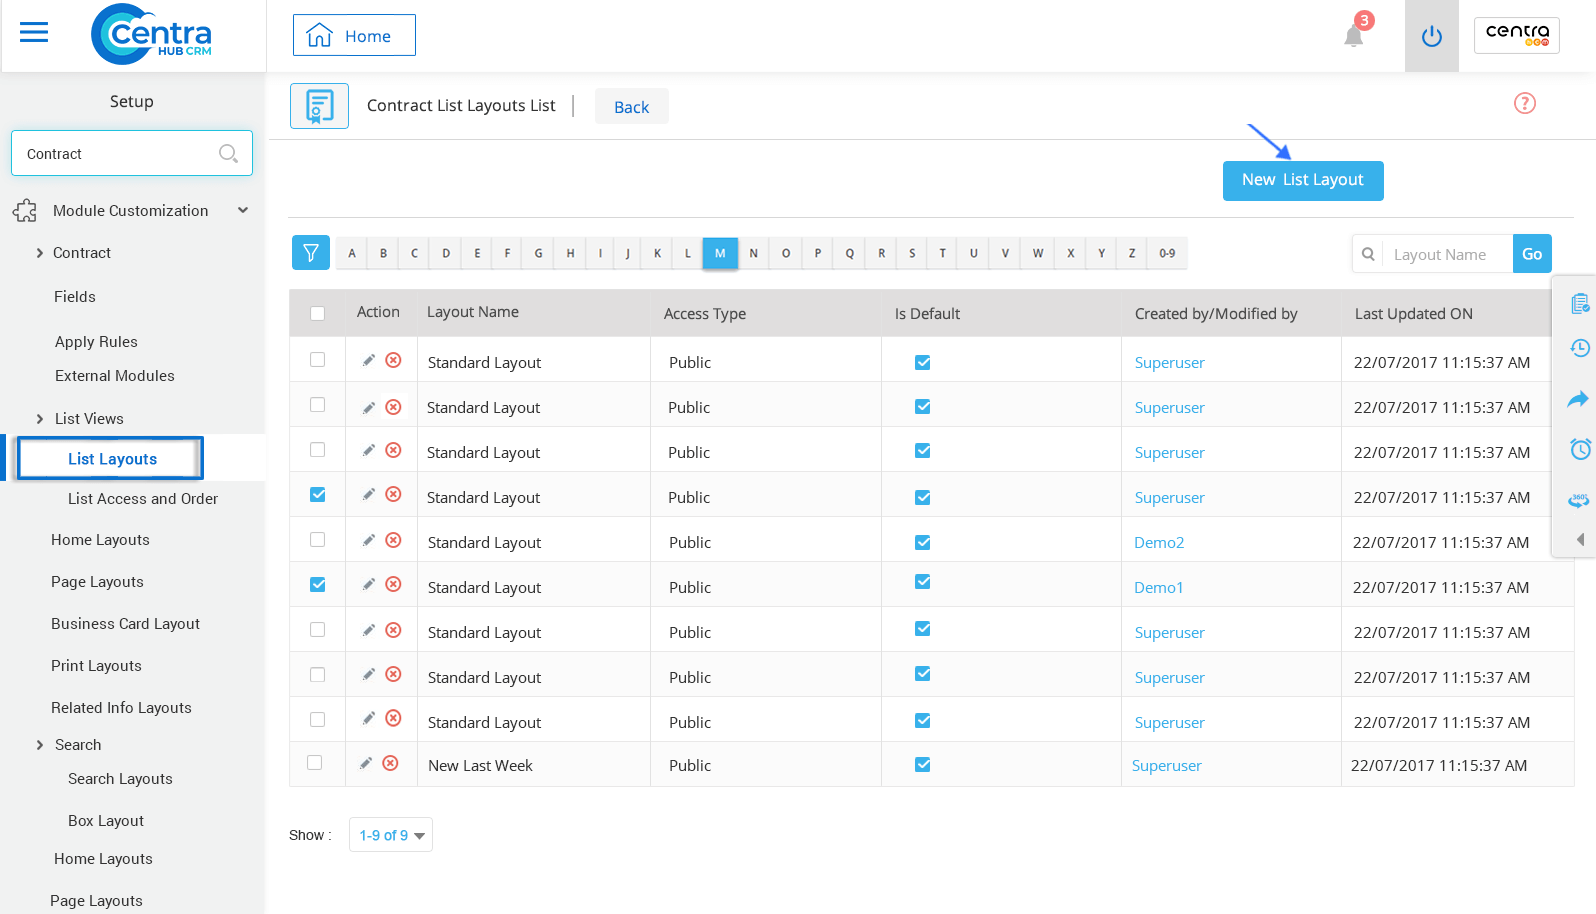
1. Go to settings of CentraHub CRM, type Contract in the search box on the left side of the screen.
2. From the Contract drop-down list, click on List Layout.
3. On the Contract List Layout page, click the New List layout.
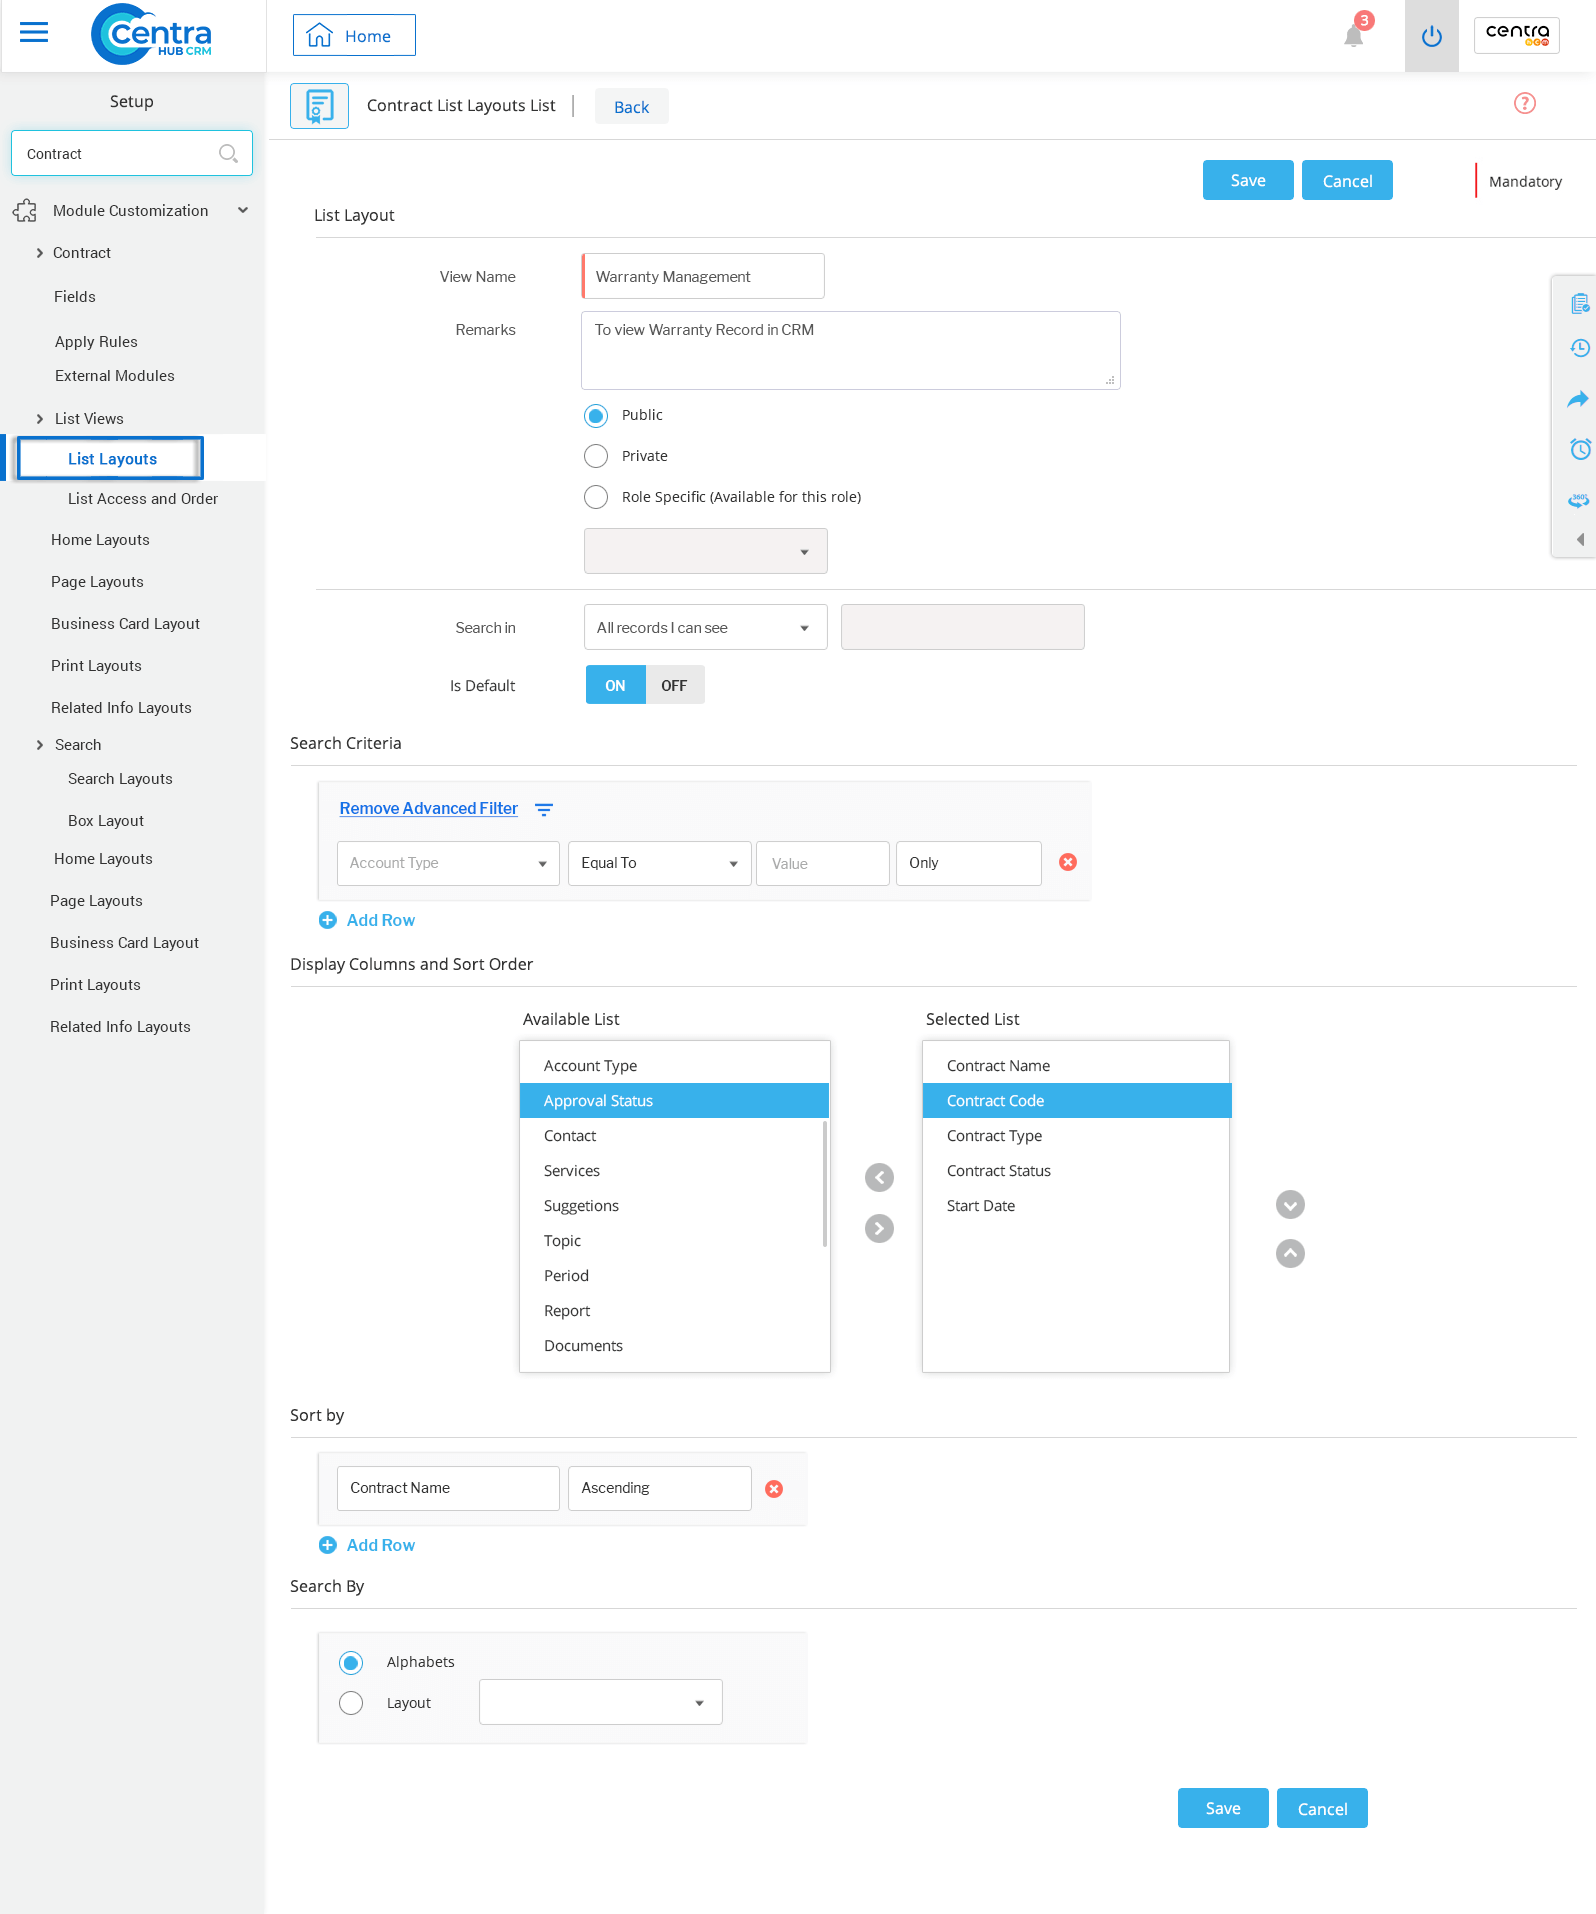
4. On the New List Layout page, enter the relevant details.
Enter view name as Warranty Management.
Enter remarks for the Warranty Management.
Select the radio button to apply view type as Public, Private or Role-specific.
Select any saved Warranty Management record
Set On for the default. (To use layout view as default for all records)
Select the search criteria.
Select features by moving them from the Available List to the Selected List using arrows.
Sort all the records in ascending or descending order.
Select the radio button to search records. (Alphabets or layout)
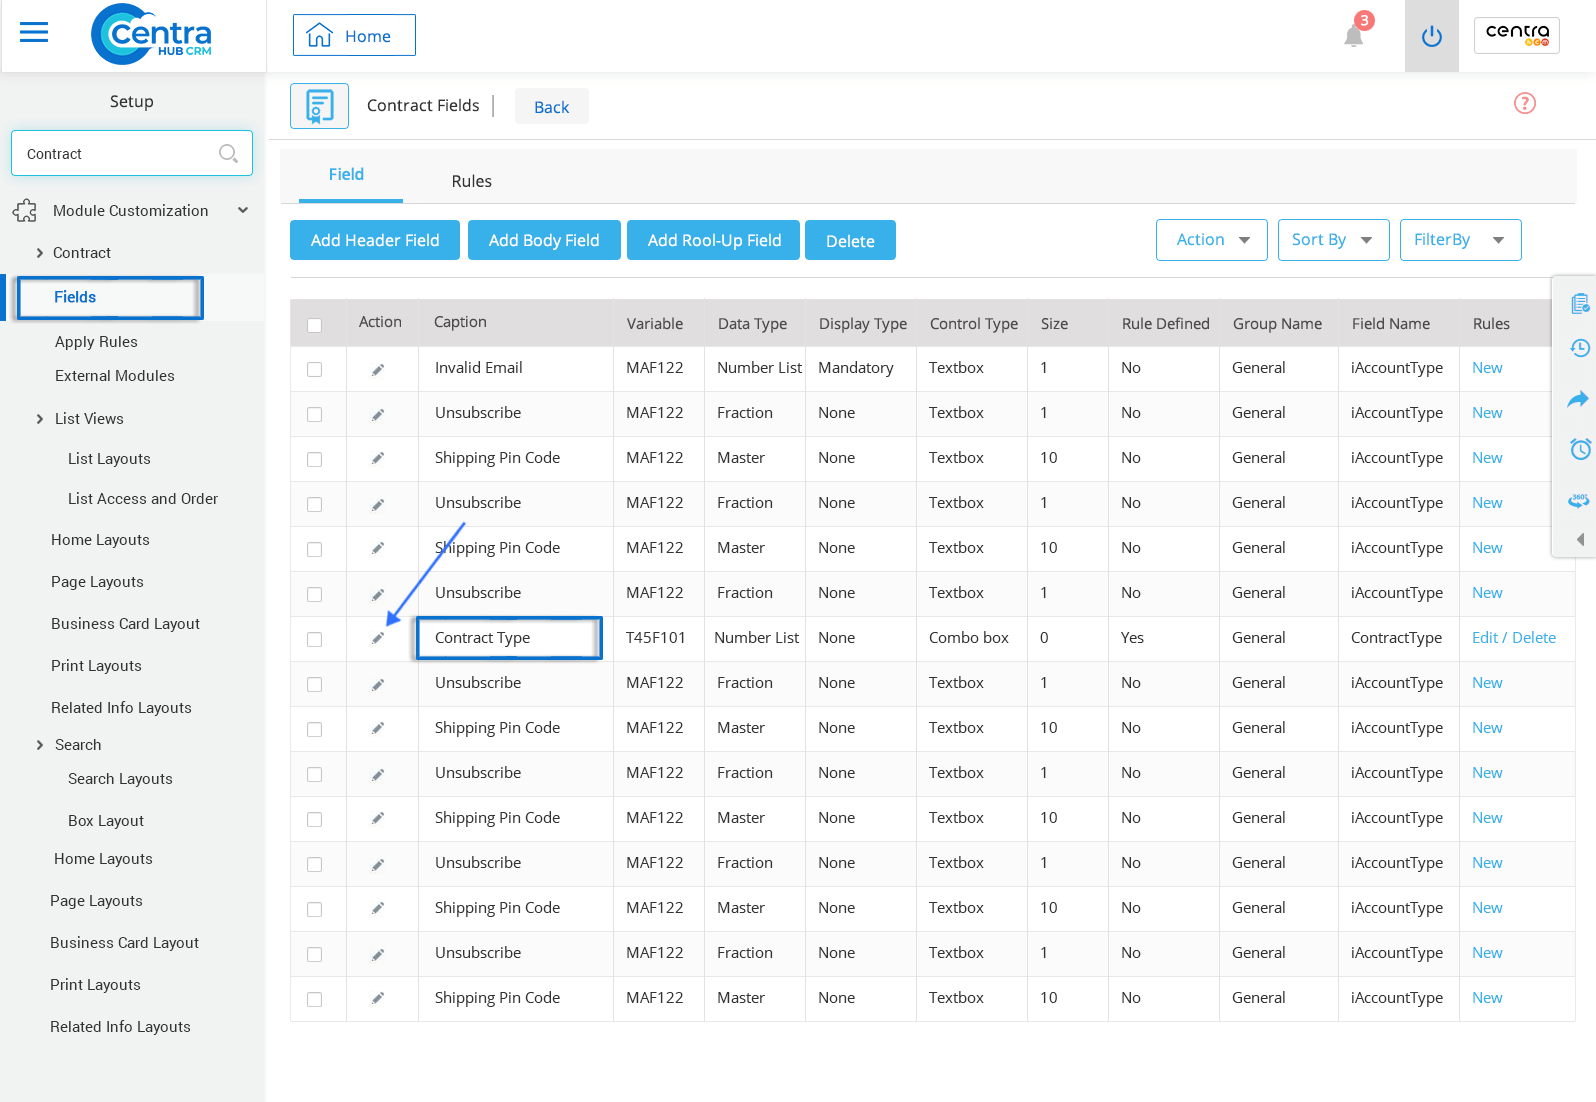
1. Under the Contract module of CRM Settings, click on Fields.
2. On the Contract Fields page, click on the Edit option beside the Contract Type. (Field properties window would be displayed)
3. Under the field setup, click on the values to create the Contract Type as Warranty.
4. Click Ok.
1. In the Contract Field list, click on Rule to create the field level rules.
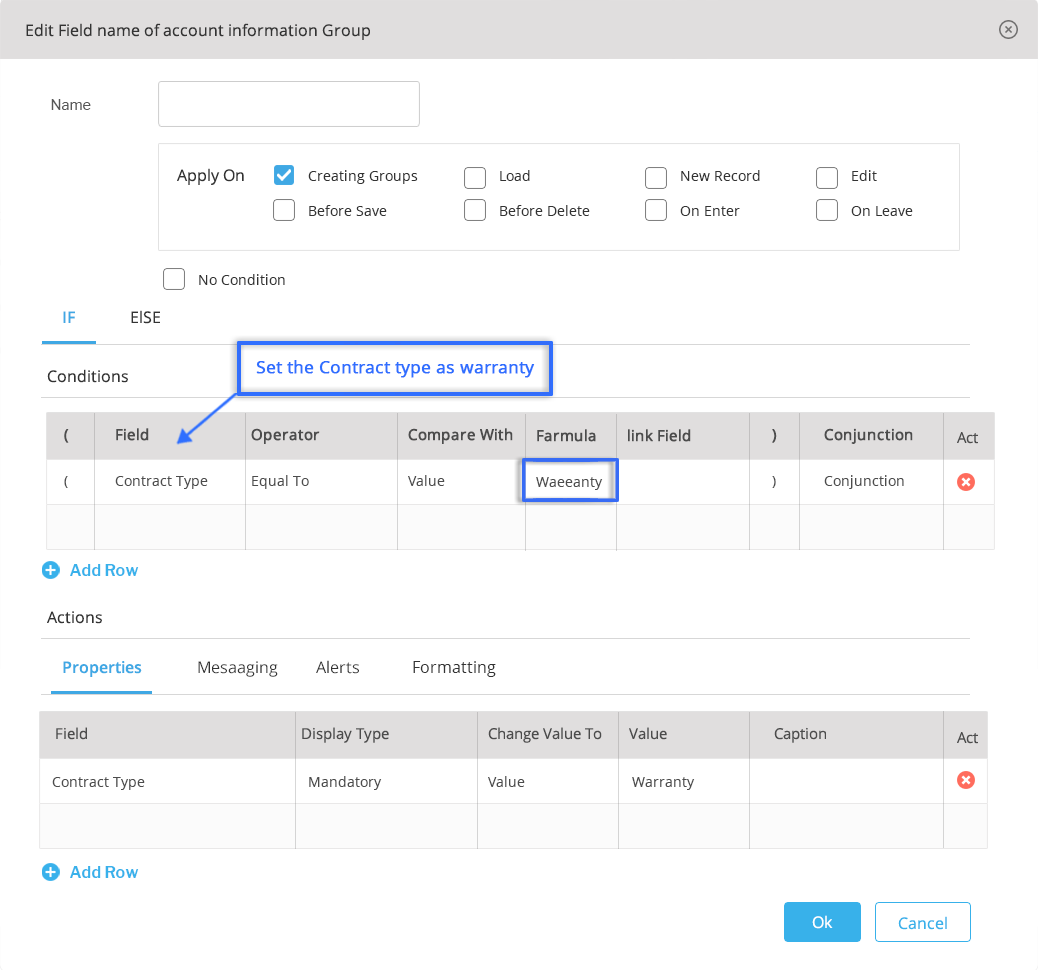
2. In the Field Rule window, do the following.
Enter the Rule name. (Example: Name | Contract type)
Select the checkbox where the field rule needed to be applied.
Enter the condition for the field.
Apply the condition. (To add more conditions click on the + button)
3. Click Ok.
Get in touch with us for details on setup and additional custom services pricing
CONTACT US


