
A Service Level Agreement is the service that you agreed to deliver to your customers. SLA management in CentraHub CRM monitors your service level performance and allows you to set conditions for resolving tickets to satisfy the SLA policy.
SLA management feature is constructed to achieve the expected output within a predefined period. It exactly tells time taken to resolve a particular ticket. It is customizable feature and you can create escalation procedures for your tickets depending upon their priority. You can even activate or deactivate SLAs which you created in the system.
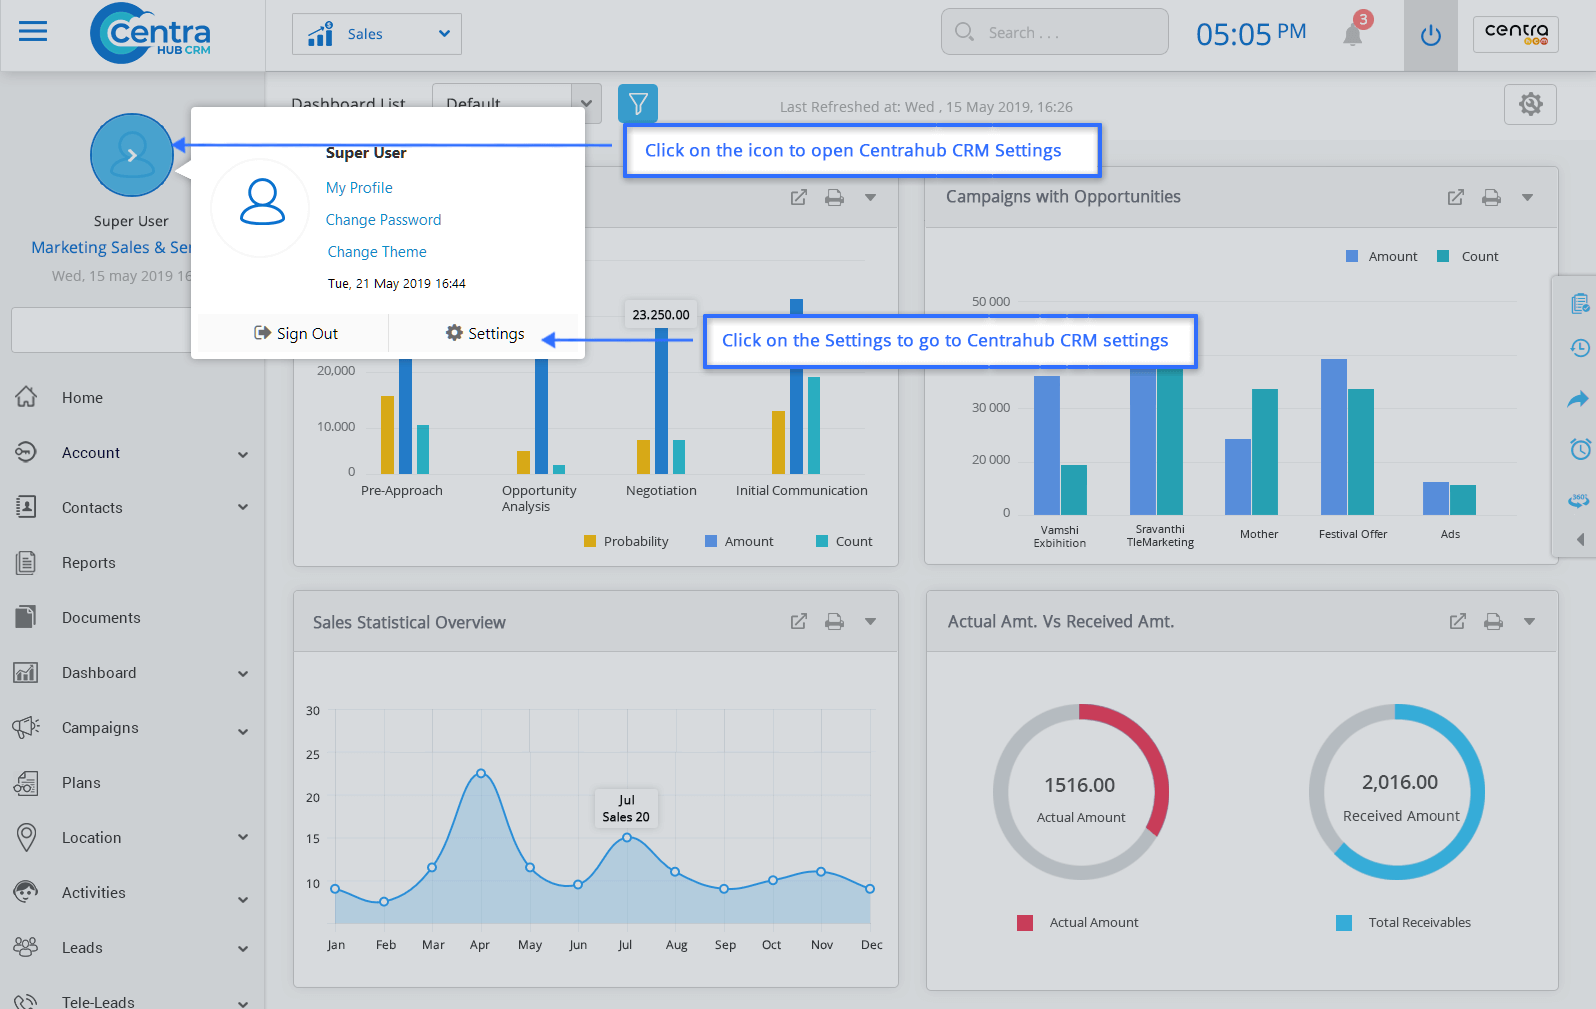
1. Go to settings of CentraHub CRM. Type SLA in the search box on the left side of the screen.
2. From the drop-down list of Service Desk, Click on SLA.
3. On SLA list page, Click on New SLA
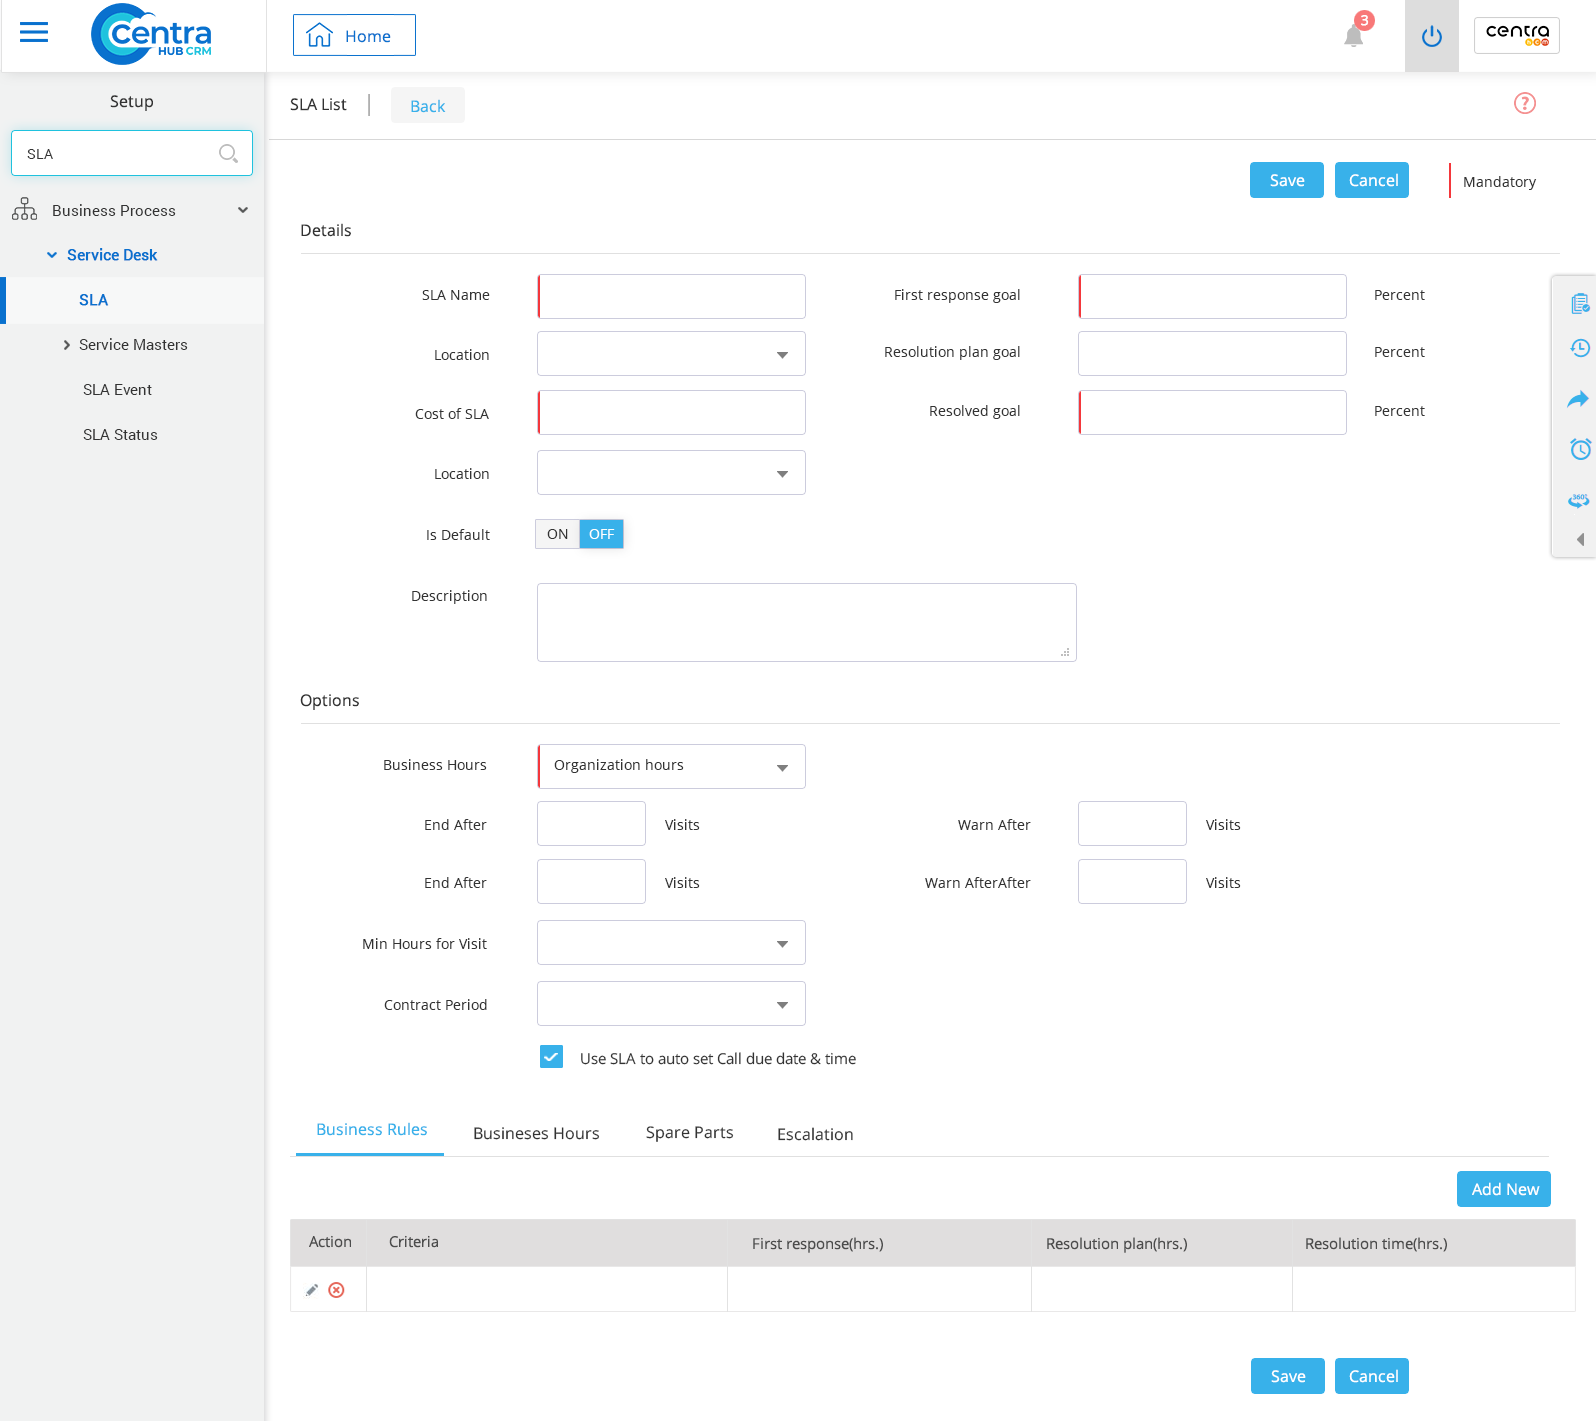
Enter the SLA name used for the service contract.
Select a location from the drop-down list.
Enter the cost of SLA used in the service contract.
Select templates of SLA from the drop-down list.
The percentage of tickets whose first responses were sent within specified SLA time period.
The total time taken to fully resolve an issue from the time it had been logged.
Percentage of tickets resolved within the specified time.
Select the Business hours from the drop-down list.
Enter the number of visits to the service contract.
Enter the number of hours of visits end.
Set alert when the visits come to end.
Enter the minimum hours of the visits.
Select the contract period from the drop-down list.
Set the business rules for the SLA. Click on Add New.
Business hours: Enter the business hours for the SLA.
Spare Parts: Select the Spare parts from the drop-down list.
Escalation: Select the escalation template from the drop-down list
4. Click Save.
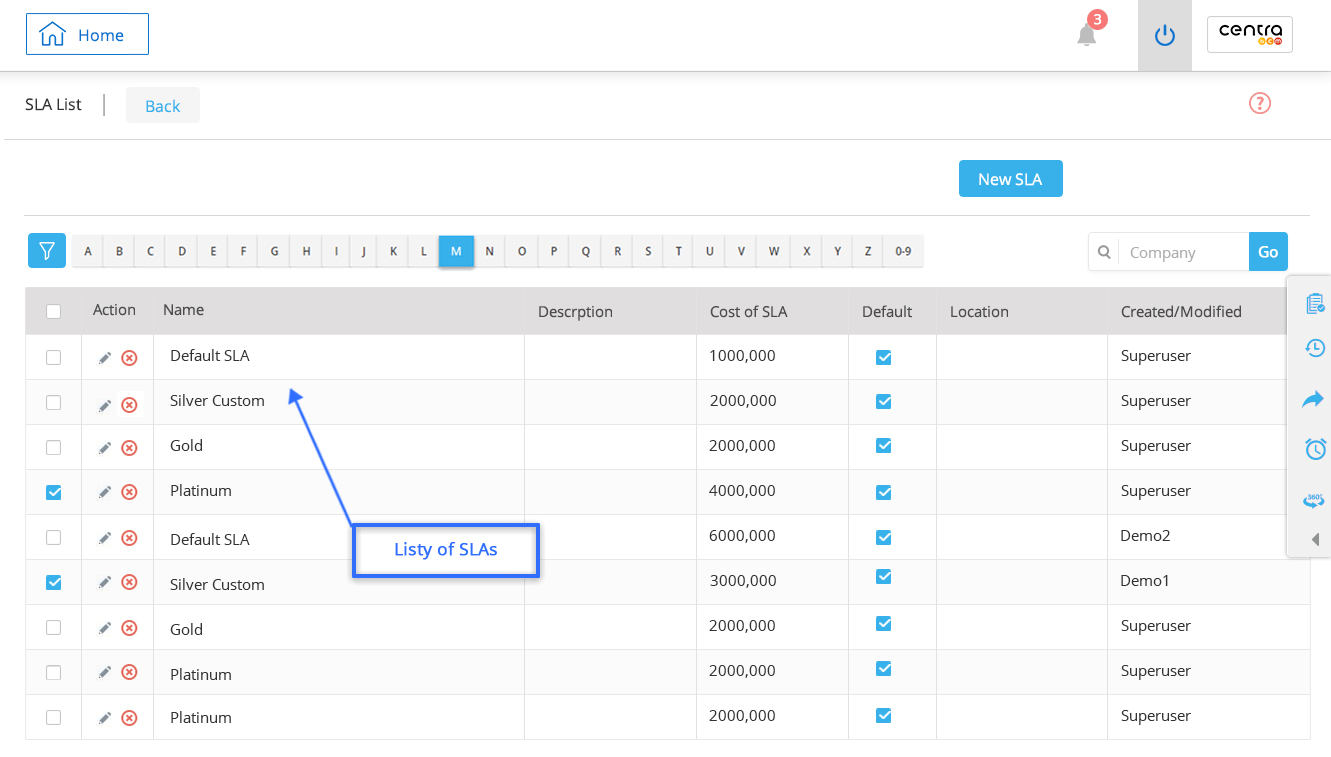
1. On the SLA List page, you can view all your SLAs.
2. To Edit SLAs, Click on the Edit option for individual SLA.
Get in touch with us for details on setup and additional custom services pricing
CONTACT US


