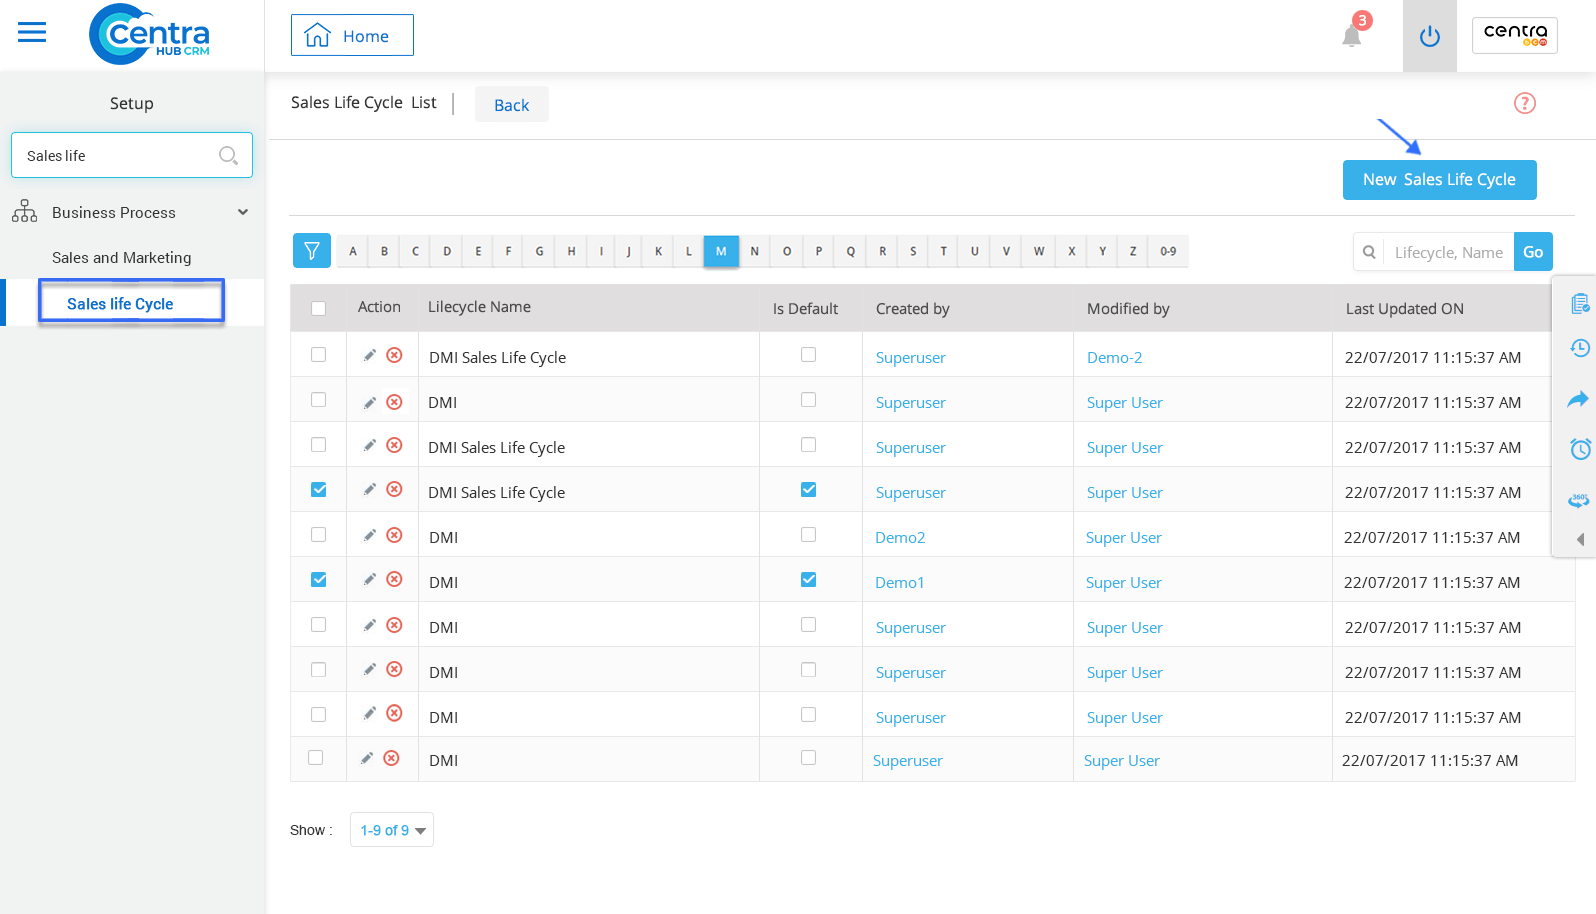


1. Go to settings of CentraHub CRM. Type Sales Life Cycle in the search box on the left side of the screen.
2. From the drop-down list of business, Click on Sales life cycle.
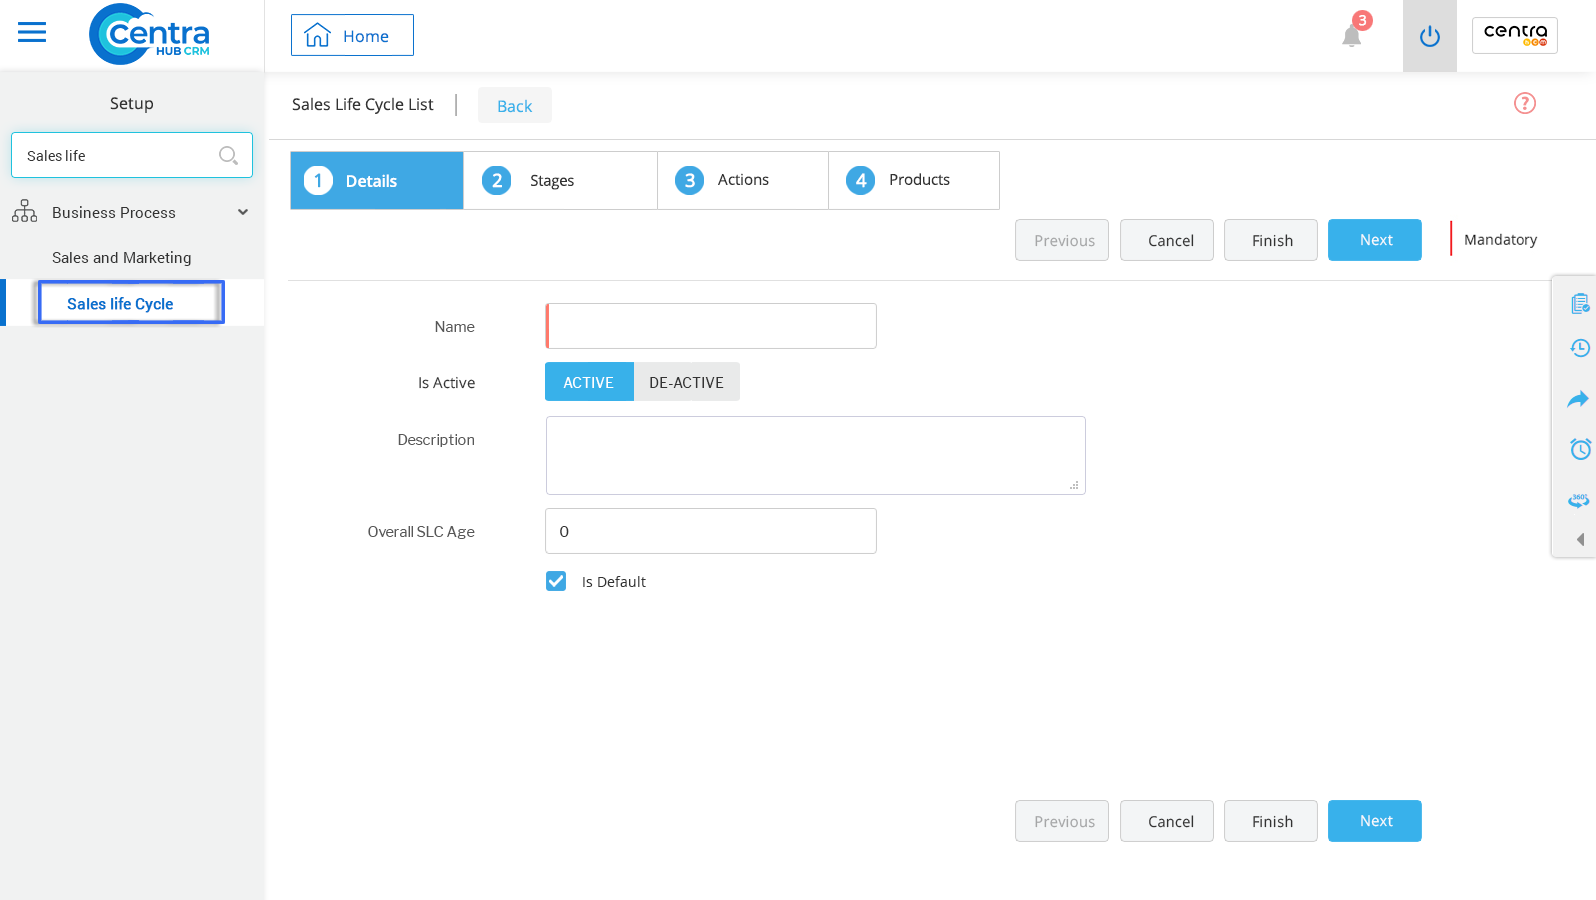
3. In the Sales Life Cycle list page, enter the relevant details.
Enter the Sales Life Cycle name.
Enter description related to the Sales Life Cycle.
Enter the overall age of SLC.
Select Active to set the Sales Life Cycle as default in your CRM
4. Click save.
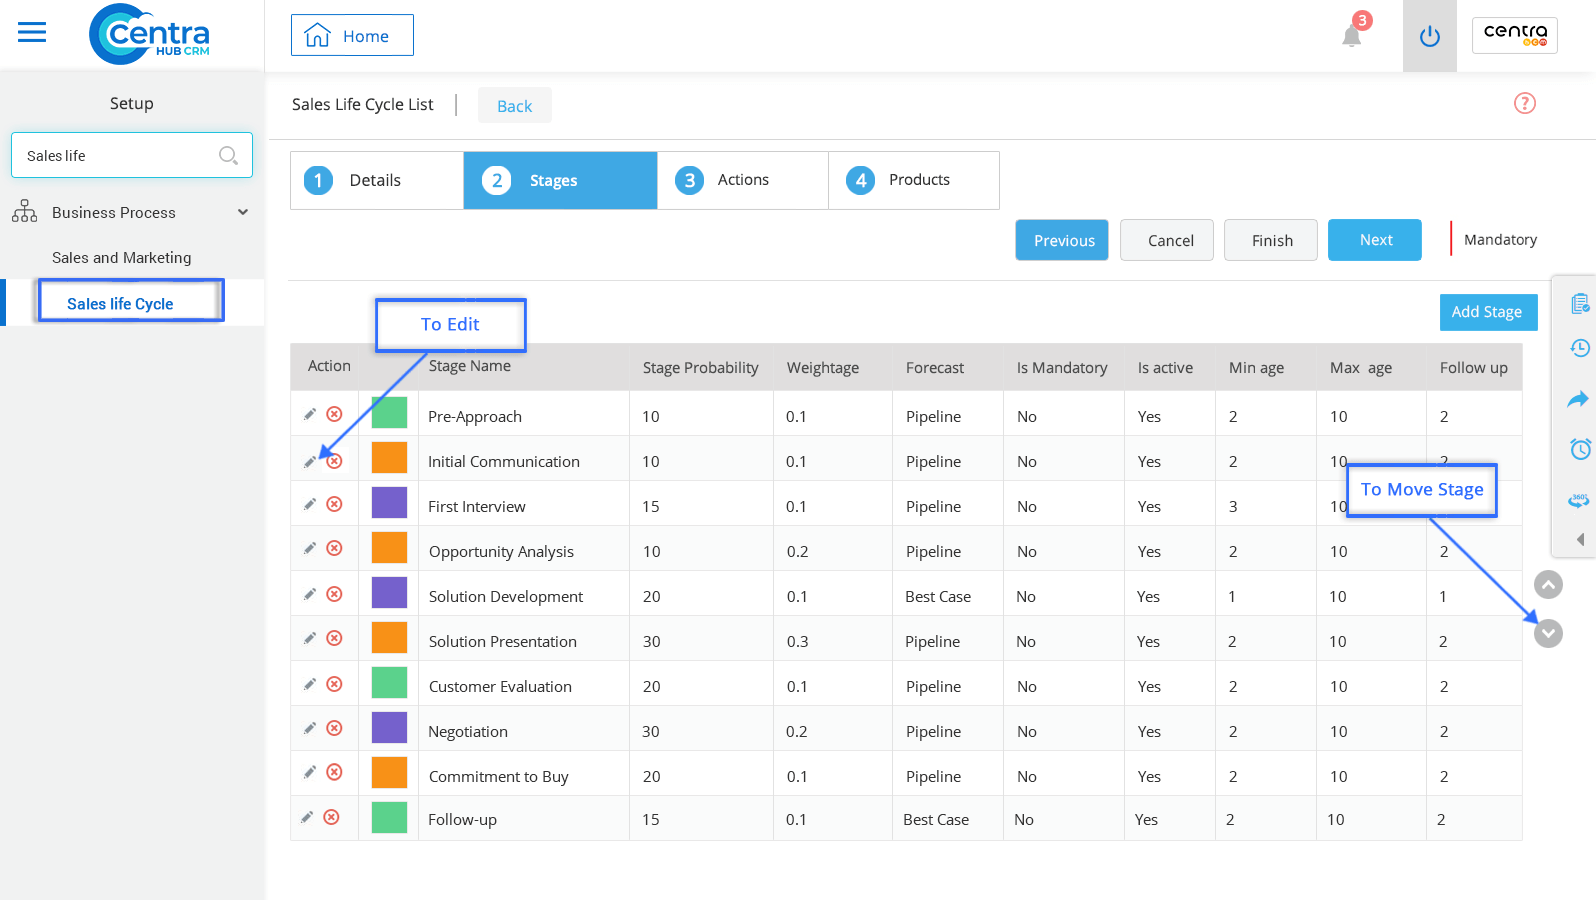
Stage: To create the stage, Click on “Add stage”.
Stage Details: Enter details for each stage of the Sales Life Cycle. As shown in the picture below.
Opportunity: Enter the opportunity stages where you can forecast your sales.
Documents: Attach all documents related to the Sales Life Cycle.
Escalation Trigger: Set the escalation rule to identify in which stage it needs to be triggered. (Click on Add to create the escalation rules)
Stage start & end Trigger: Set the start and end time of the trigger. Select the template for how it has to be triggered.
List of Stages in Sales Life Cycle
Stage Mapping: Select in which stage quotation and sales order have to be created
Products: Enter the product in the Sales Life Cycle. (To add more products, click + option and to delete, click on the Delete icon)
4. Click Finish.
Get in touch with us for details on setup and additional custom services pricing
CONTACT US


