

1.Access the settings of CentraHub CRM. Type ‘CSS’ in the search box.
2. Access the drop-down list of the Service desk and click on the CSS settings.
3.Under the CSS settings, Click on Access settings to create a CSS portal.
4.Enter the relevant details on the Access settings page.
Enter the name of the portal.
From the drop-down list, select the default user by whom the portal would be considered as created.
Specify the default request status for the portal. (this is where customers could raise requests through the CSS portal))
Specify the request priority from the drop-down list as ‘high’, ‘low’, ‘medium’ or ‘normal’, depending on the customer.
Use the drop-down list to define the list view layout.
Set the password policy as default or high.
Select the radio button view type depending on customers. (It could be thread view or list view).
Set the notification interval for the portal.
Enter the welcome note. When the customer logs in to the CSS portal, this welcome note would be displayed.
This link could be used the user to login to the customer portal. .
Select the radio button for login purpose. The login could be through contact email, password or other customizable field(s).
If you are selecting login based on “Custom field” then select the module and field of that module from the drop-down list.
5. Click Save.
After creating the Access settings, you would have to map the module.
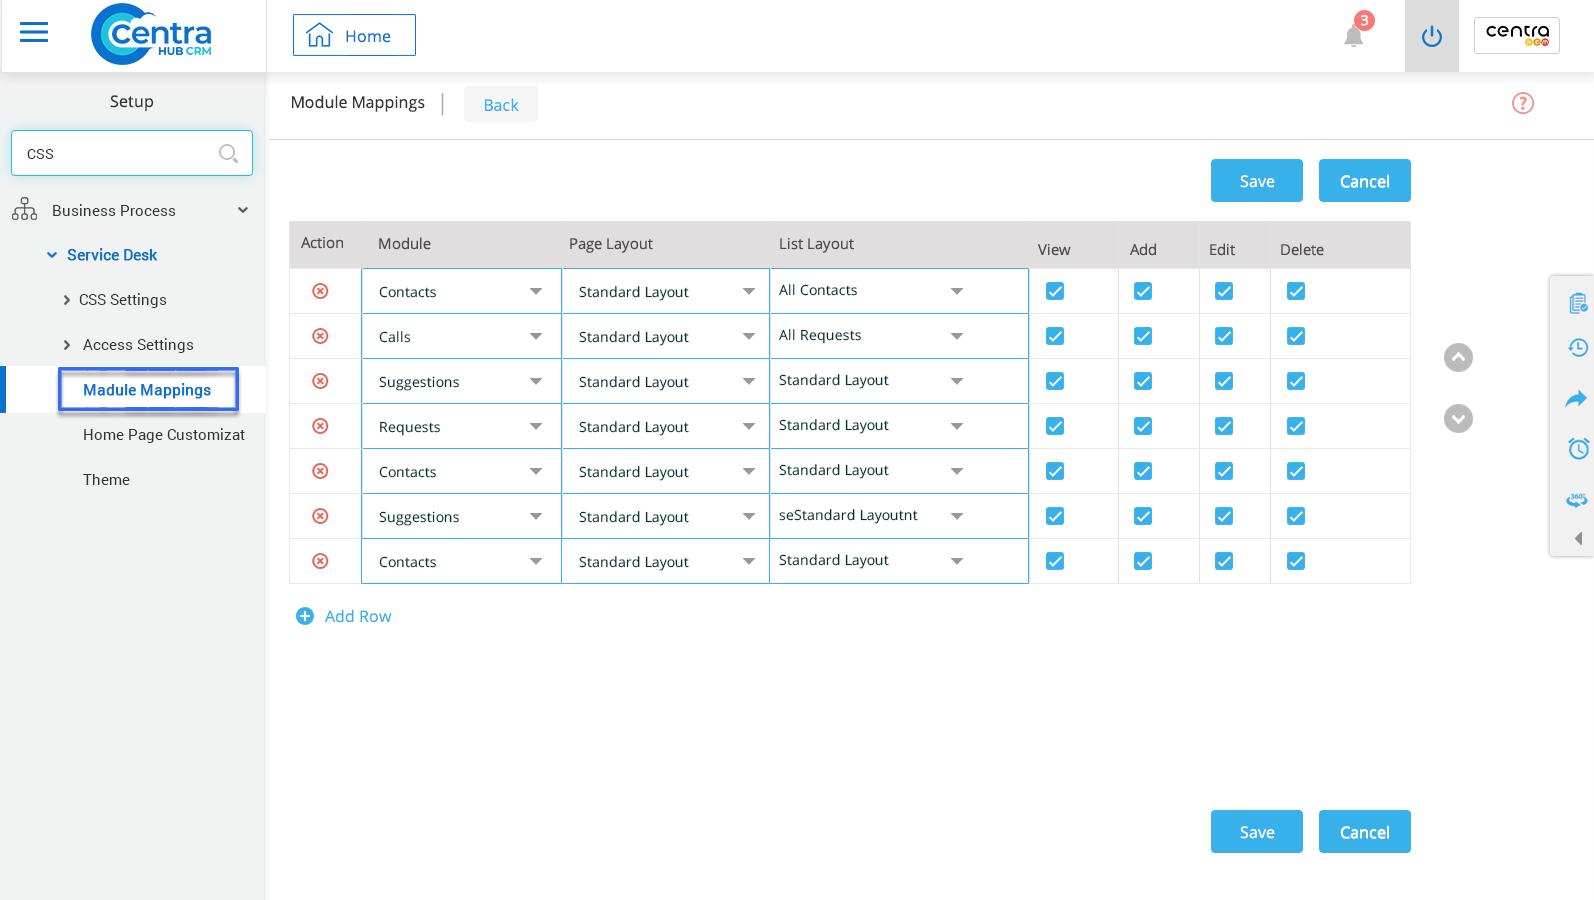
1. Click on Module Mapping from the drop-down list of the CSS settings. The Module mapping page would be displayed.
2. Select the modules for which the user would have access on their CSS portal.
3. Access the drop-down list and select the Page layout and list layout for the particular module.
4. For the modules on CSS portal, you could provide access rights depending upon the business requirement. (i.e. View, Add, Edit or Delete rights)
5. Click Save.
The Menu on the homepage customization would display modules that you have mapped on the CRM portal.
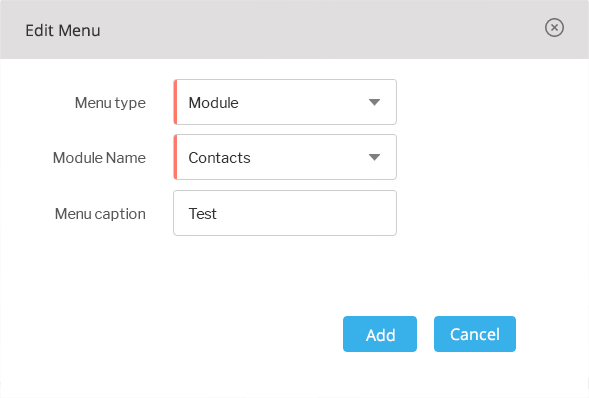
1. Move your cursor the Request option where you would find the option to edit. After clicking on it, you could access the Edit Menu window where you could customize and modify the homepage.
2. Active: Select on the checkbox beside Active for activating the element on the homepage.
3. Alerts: Alerts is a widget which is already created in the default homepage. (With this widget, the user could view alerts or notification regarding request, appointments and so on.)
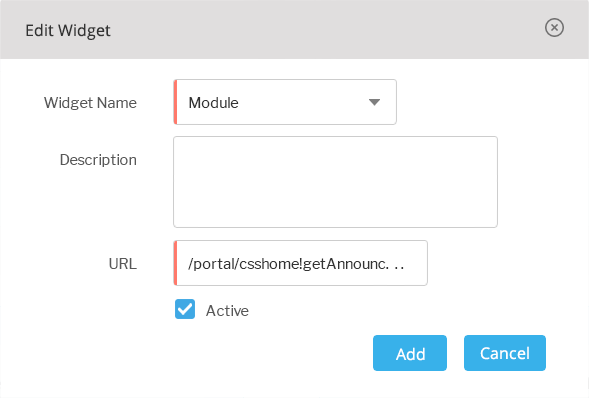
4. Click on + option to add anew widget on the homepage. The Add widget window would be displayed.
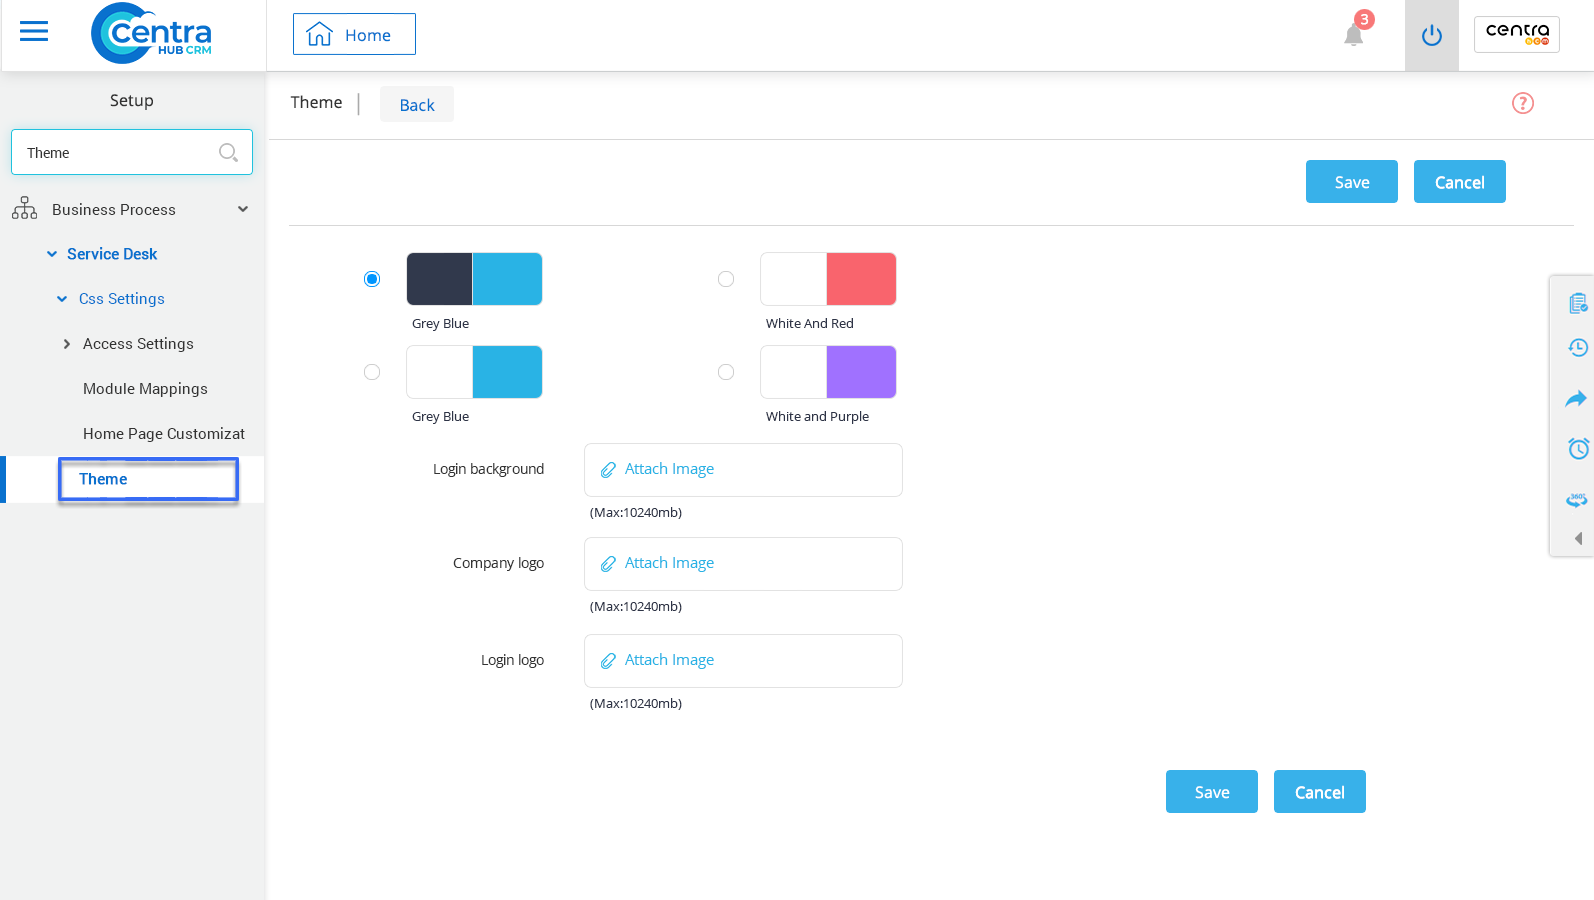
Themes: After the home page customization, you can set the theme for CRM.
Get in touch with us for details on setup and additional custom services pricing
CONTACT US


